SUMMARY
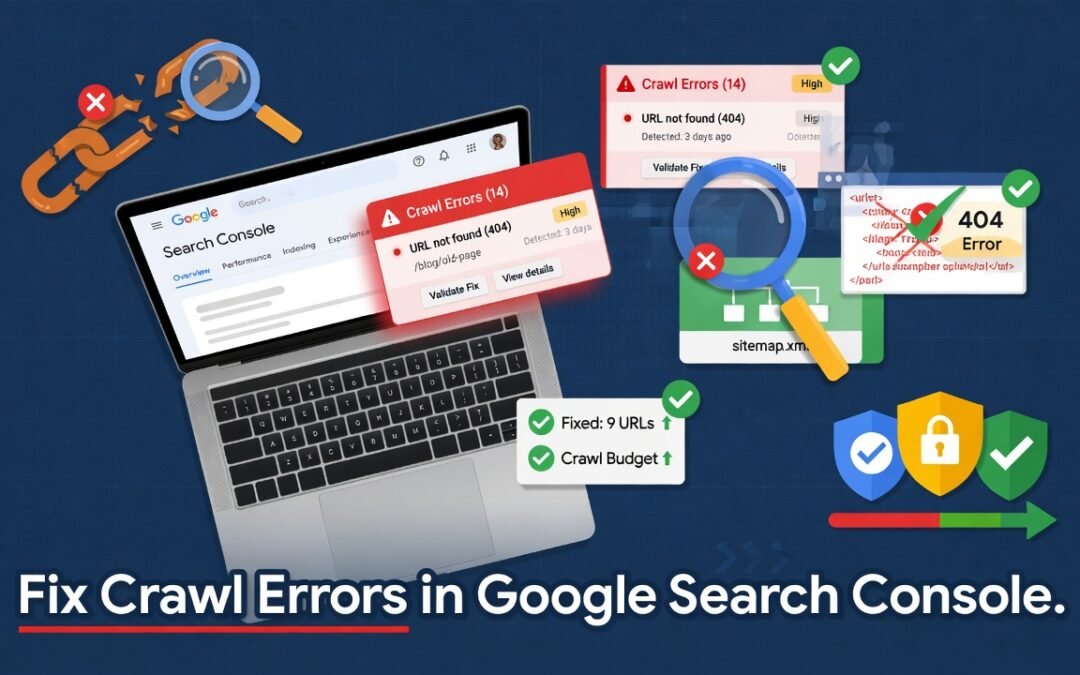
Crawl errors in Google Search Console are one of the most common — and most misunderstood — technical SEO challenges website owners face. When Googlebot cannot access, read, or index your web pages, your rankings suffer silently. This in-depth guide Fix Crawl Errors in Google Search Console walks you through exactly what crawl errors are, why they happen, and — most importantly — how to fix them step by step using Google Search Console. Whether you’re dealing with 404 Not Found pages, server errors, redirect issues, or URL inspection problems, this article covers every scenario with actionable solutions backed by SEO best practices.
TABLE OF CONTENTS
- What Are Crawl Errors in Google Search Console?
- Why Crawl Errors Hurt Your SEO Rankings
- Types of Crawl Errors You’ll Encounter
- How to Access the Coverage Report in Google Search Console
- Step-by-Step Guide to Fix Crawl Errors
- How to Use the URL Inspection Tool
- How to Submit a Sitemap to Prevent Future Crawl Errors
- Monitoring Crawl Errors Ongoing
- When to Call in an SEO Expert
- Conclusion
What Are Crawl Errors in Google Search Console?
Google Search Console (GSC) is a free web service provided by Google that helps website owners monitor, maintain, and troubleshoot their site’s presence in Google Search results. One of the most critical features inside GSC is the Coverage Report — formerly known as the Index Coverage Report — which reveals exactly which URLs on your website Google can crawl, which it cannot, and why.
Crawl errors occur when Googlebot — Google’s automated web spider — attempts to visit a page on your website and fails. This failure can happen for a range of technical reasons: the page no longer exists, the server is temporarily down, the page is blocked by a robots.txt directive, or a redirect chain is broken. Regardless of the root cause, crawl errors signal to Google that something is wrong with your website’s technical health.
From an SEO perspective, crawl errors are more than just annoyances — they are direct threats to your organic search visibility, crawl budget, and page indexing efficiency. If Googlebot cannot crawl your pages, those pages cannot be indexed. Pages that are not indexed cannot rank. It’s that simple.
Understanding and resolving crawl errors is foundational to any solid technical SEO strategy.
Why Crawl Errors Hurt Your SEO Rankings
Before diving into how to fix crawl errors, it’s essential to understand why they matter so much to your search engine optimization performance.
1. Wasted Crawl Budget Every website is allocated a crawl budget by Google — the number of pages Googlebot will crawl within a given timeframe. When your site is riddled with broken URLs, redirect loops, and server errors, Googlebot wastes its limited crawl capacity chasing dead ends instead of discovering and indexing your valuable content.
2. Lost Indexing Opportunities Every URL that returns a crawl error is a URL that cannot be indexed. If a money-making product page, a high-value blog post, or a critical service page is returning a 404 or 500 error, it simply won’t appear in Google Search — resulting in lost organic traffic and revenue.
3. Damaged Domain Authority Signals. Persistent crawl errors contribute to poor site health scores, which in turn send negative quality signals to Google. A website that is difficult to crawl is perceived as poorly maintained, which can negatively impact overall domain authority and trustworthiness.
4. Poor User Experience Crawl errors often mirror what real users experience. A page that Googlebot can’t reach is usually a page that human visitors also can’t access — leading to high bounce rates, user frustration, and a damaged brand reputation.
⚠️ Pro Tip: If you’ve noticed a sudden drop in organic traffic alongside an increase in crawl errors, it’s not a coincidence. Prioritize fixing your crawl errors immediately.
Types of Crawl Errors You’ll Encounter
Google Search Console categorizes crawl errors into several distinct types. Understanding each type is the first step toward fixing them effectively.
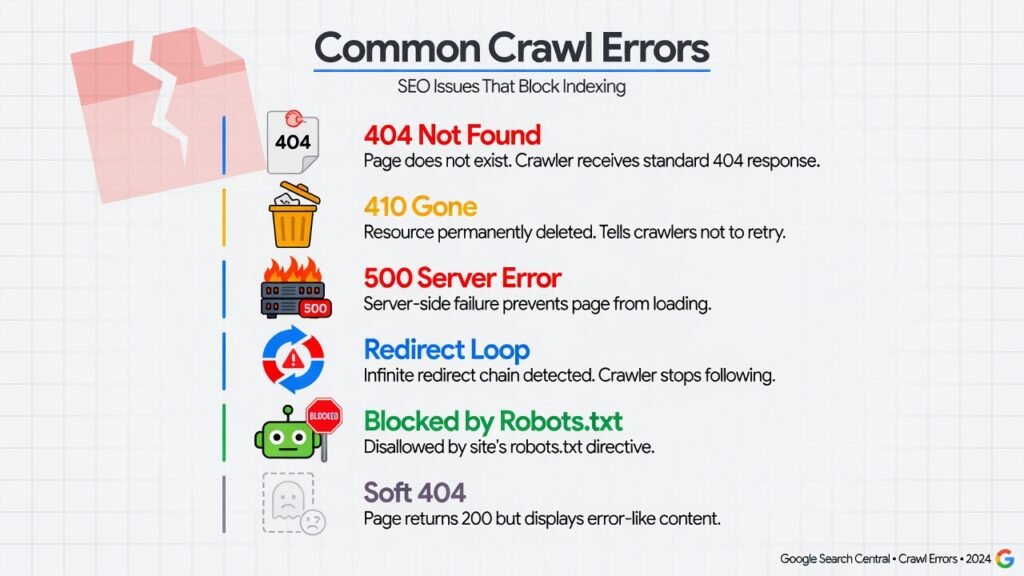
404 Not Found — The most common crawl error. The page URL exists in Google’s index or sitemap, but the actual web page has been deleted, moved, or renamed without a proper redirect.
410 Gone — Similar to 404, but this status code explicitly tells Google the page has been permanently removed. While intentional, it still needs to be managed carefully.
500 Server Errors (5xx) — These indicate that your web server encountered an internal problem and failed to serve the requested page. They are often caused by hosting issues, plugin conflicts (common in WordPress), or database connectivity problems.
Redirect Errors — Including redirect loops (A → B → A), redirect chains that are too long, and broken redirects that lead to non-existent pages.
Blocked by Robots.txt — Pages intentionally or accidentally blocked from Googlebot via your robots.txt file. Sometimes critical pages get blocked unintentionally during development.
Noindex Tag Conflicts — Pages that are listed in your XML sitemap but also carry a noindex meta tag, creating a contradictory signal for search engines.
Soft 404 Errors — Pages that return a 200 OK status code but display a “page not found” or empty content message to users. Google is smart enough to detect these and treats them as errors.
How to Access the Coverage Report in Google Search Console
Before you can fix anything, you need to know where to look. Here is how to navigate to the crawl error data inside Google Search Console.
Navigating to the Coverage (Indexing) Report
Step 1: Log in to your Google Search Console account at search.google.com/search-console.
Step 2: Select the correct property (website) from the dropdown at the top left.
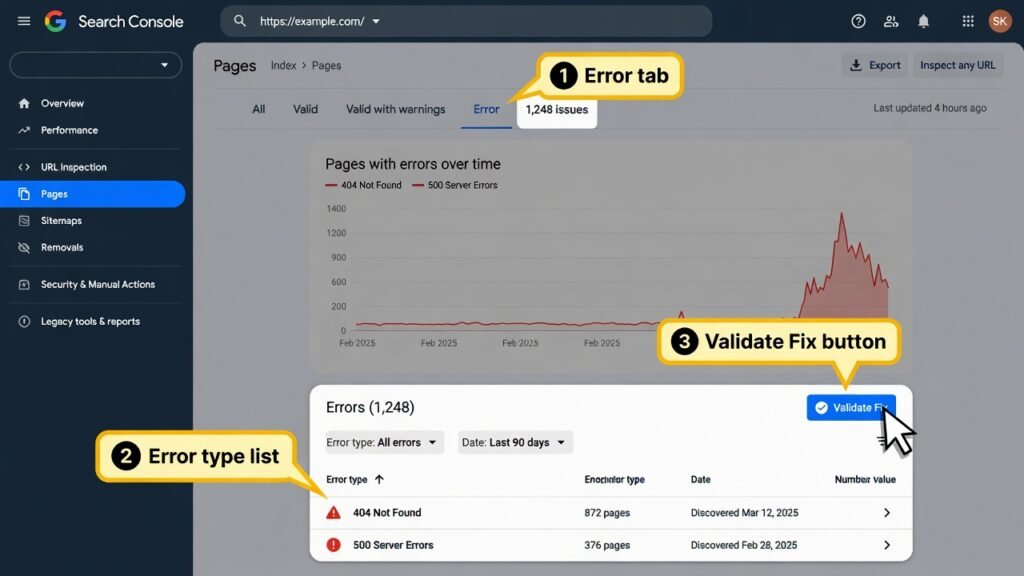
Step 3: In the left-hand navigation panel, click on “Indexing” to expand the submenu.
Step 4: Click “Pages” (previously labeled “Coverage”). This opens the full Index Coverage Report.
Step 5: You will see four tabs at the top of the report:
- Error — Pages with critical issues preventing indexing
- Valid with Warning — Pages indexed but with issues to review
- Valid — Pages successfully indexed
- Excluded — Pages intentionally or unintentionally not indexed
Step 6: Click on the “Error” tab first. This is where your most urgent crawl issues live.
Step 7: Below the graph, you’ll see a list of error types with the number of affected URLs. Click on any error type to expand it and see the specific URLs affected.
💡 Important: Always filter by “All Known Pages” and “Google-crawled pages” using the top dropdown to get the most comprehensive view of your site’s crawl health.
Step-by-Step Guide to Fix Crawl Errors
Now that you know where to find your crawl errors, let’s fix them one by one.
Step 1: Identify the Error Type and Prioritize
Not all crawl errors are created equal. Before you start fixing things randomly, create a prioritization framework:
High Priority:
- Errors affecting your most important pages (homepage, service pages, product pages, top blog posts)
- Server errors (5xx) affecting large numbers of URLs
- Pages that were previously ranking well
Medium Priority:
- 404 errors on pages with external backlinks pointing to them
- Redirect chain errors
Low Priority:
- 404 errors on intentionally deleted pages with no backlinks
- Excluded pages that are correctly excluded (e.g., login pages, admin panels)
Export the full error list by clicking the download icon in the top right of the report. This gives you a CSV file you can sort and prioritize in a spreadsheet.
Step 2: Fix 404 Not Found Errors
404 errors are the most common crawl errors and also among the most straightforward to fix.
Diagnose the cause first:
- Was this page intentionally deleted? → Set up a 301 redirect to the most relevant existing page.
- Was the URL changed or the page moved? → Implement a 301 permanent redirect from the old URL to the new one.
- Is the page missing due to a CMS error? → Republish or restore the page.
How to implement a 301 redirect:
For WordPress users: Install a redirect plugin such as Redirection or Yoast SEO Premium. Navigate to Tools → Redirection → Add New Redirect. Enter the old URL in the “Source URL” field and the new destination URL in the “Target URL” field. Set the type to 301 (Permanent).
For non-WordPress sites: Add a redirect rule to your .htaccess file (Apache servers):
Redirect 301 /old-page-url/ https://www.yourwebsite.com/new-page-url/
For NGINX servers, add to your server block configuration:
rewrite ^/old-page-url/$ https://www.yourwebsite.com/new-page-url/ permanent;
Key rule: Always redirect to the most topically relevant page. Avoid redirecting all broken URLs to your homepage — this is a “soft 404” behavior that Google penalizes.
Step 3: Fix Server Errors (5xx)
5xx errors indicate problems on your web server’s end. Common causes include:
- Overloaded hosting servers — Particularly on shared hosting plans with high traffic spikes
- WordPress plugin or theme conflicts — A faulty plugin can crash your PHP environment
- Database connection failures — MySQL timeout or credential errors
- Misconfigured .htaccess — A syntax error can bring down your entire site
- Memory limit exceeded — WordPress PHP memory exhaustion
How to fix 5xx server errors:
- Check your hosting uptime logs — Contact your hosting provider and request access to server error logs. Look for timestamps that match the errors reported in GSC.
- Deactivate plugins one by one — If you’re using WordPress, disable all plugins via FTP by renaming the /wp-content/plugins/ folder. Then re-enable them one at a time to find the culprit.
- Increase PHP memory limit — Add define(‘WP_MEMORY_LIMIT’, ‘256M’); to your wp-config.php file.
- Check your .htaccess file — Replace it with the default WordPress .htaccess content:
# BEGIN WordPress
<IfModule mod_rewrite.c>
RewriteEngine On
RewriteBase /
RewriteRule ^index\.php$ - [L]
RewriteCond %{REQUEST_FILENAME} !-f
RewriteCond %{REQUEST_FILENAME} !-d
RewriteRule . /index.php [L]
</IfModule>
# END WordPress- Upgrade your hosting plan — If the errors are caused by resource limits, consider upgrading to a VPS or managed WordPress hosting solution.
Step 4: Fix Redirect Errors
Redirect errors come in several flavors, each requiring a slightly different fix.
Redirect Loop: URL A redirects to URL B, which redirects back to URL A. Fix this by auditing all redirects using a tool like Screaming Frog SEO Spider or Ahrefs Site Audit. Identify the circular dependency and break the loop by correcting one of the redirect rules.
Redirect Chain Too Long: A chain of more than 3 redirects (A → B → C → D) wastes crawl budget and dilutes link equity. Fix by updating all source redirects to point directly to the final destination URL.
Broken Redirect: The redirect points to a URL that itself returns a 404. Fix by updating the redirect destination to a live, valid URL.
💡 Use Screaming Frog’s “Response Codes” report to visualize all redirect chains across your site in one view. Filter by 3xx to see every redirect and trace the chains.
Step 5: Fix “Blocked by Robots.txt” Issues
If Google Search Console is showing pages as “Blocked by robots.txt,” it means your robots.txt file is preventing Googlebot from accessing those pages.
How to check your robots.txt file: Visit https://yourwebsite.com/robots.txt in any browser. You’ll see the raw text file. Look for Disallow directives.
Problematic example:
User-agent: *

Disallow: /

This blocks ALL bots from ALL pages — a catastrophic mistake that is surprisingly common after website migrations.
Correct example for most websites:
User-agent: *

Disallow: /wp-admin/

Disallow: /wp-login.php

Disallow: /cart/

Disallow: /checkout/

Allow: /wp-admin/admin-ajax.php

Sitemap: https://www.yourwebsite.com/sitemap.xml
Using the robots.txt Tester in GSC:
- In Google Search Console, go to Settings → robots.txt.
- Paste or review your robots.txt content.
- Enter the URL of a page that was reported as blocked.
- Click “Test” — GSC will tell you whether the URL is blocked and which rule is causing it.
Once you’ve corrected the robots.txt rule, the block will be lifted the next time Googlebot visits. You can also manually request a recrawl using the URL Inspection Tool (see Step 7).
Step 6: Fix “Submitted URL Not Found (404)” Errors
This specific error type in Google Search Console means a URL is in your XML sitemap but returns a 404 error when Googlebot visits it. This is a doubly serious problem because you’re actively telling Google to crawl a broken page.
Fix strategy:
- Audit your XML sitemap — Use a tool like XML Sitemap Validator or Screaming Frog to crawl your entire sitemap and identify all URLs returning non-200 status codes.
- Remove broken URLs from your sitemap — Edit your sitemap.xml file (or use your SEO plugin like Yoast or RankMath) to remove all 404 URLs.
- Regenerate your sitemap — After fixing the underlying broken pages, regenerate and resubmit a clean sitemap.
- Resubmit your sitemap in GSC — Go to Indexing → Sitemaps in Google Search Console, delete the old sitemap submission, and resubmit the updated URL.
Step 7: Validate and Request Re-Indexing
After fixing your crawl errors, you need to tell Google that the issues are resolved. Here’s how:
Method 1: Validate Fix in the Coverage Report
- Return to the Indexing → Pages report in GSC.
- Click on the error type you’ve fixed.
- Scroll down to see the affected URLs list.
- Click the “Validate Fix” button in the top right.
- Google will begin re-crawling the affected URLs, typically within a few days to a couple of weeks.
Method 2: Request Indexing via URL Inspection. For individual priority pages, use the URL Inspection Tool (covered in the next section) to manually request Google to recrawl and re-index a specific page.
How to Use the URL Inspection Tool
The URL Inspection Tool inside Google Search Console is one of the most powerful diagnostics available to webmasters and SEO professionals. It gives you a live snapshot of how Google sees any individual URL on your website.
How to Use It
- In Google Search Console, click “URL Inspection” in the left sidebar (or use the search bar at the top).
- Enter the full URL of the page you want to inspect (include the https:// protocol).
- Press Enter. GSC will retrieve the latest crawl data for that URL.
What the Results Tell You
- URL is on Google — The page is indexed and searchable.
- URL is not on Google — The page is not currently indexed. The panel will explain why.
- Coverage — Shows the indexing status, redirect information, and any applicable errors.
- Enhancements — Shows structured data (schema markup), AMP validity, and Core Web Vitals status.
- Last crawl date — Tells you when Googlebot last visited the page.
Requesting a Recrawl
After fixing an error on a specific page:
- Use the URL Inspection Tool on that page’s URL.
- Click “Request Indexing” at the top right of the panel.
- Google will add it to the priority crawl queue. This can take anywhere from a few hours to several days.
⚠️ Note: The Request Indexing function is rate-limited. You can only submit a limited number of requests per day, so prioritize your most important pages.
How to Submit a Sitemap to Prevent Future Crawl Errors
A clean, up-to-date XML sitemap is your best preventative tool against crawl errors. It acts as a roadmap for Googlebot, telling it exactly which pages on your site are canonical and should be crawled and indexed.
Creating a Clean Sitemap
Use an SEO plugin (Yoast SEO, RankMath, or All in One SEO) on WordPress to auto-generate your sitemap. For non-WordPress sites, use XML-Sitemaps.com or a custom script.
Rules for a healthy sitemap:
- Include only canonical, indexable URLs (no noindex pages)
- Include only live URLs returning 200 OK status
- Do not include paginated pages, session-based URLs, or admin pages
- Keep it under 50,000 URLs per sitemap file (use a sitemap index for larger sites)
- Update it automatically when new content is published
Submitting Your Sitemap in Google Search Console
- Go to Indexing → Sitemaps in GSC.
- Enter your sitemap URL (e.g., https://www.yourwebsite.com/sitemap.xml).
- Click “Submit.”
- GSC will begin processing. Return after 24–48 hours to see the submission status.
A successfully processed sitemap will show “Success” in the status column along with the number of submitted and discovered URLs.
Monitoring Crawl Errors Ongoing
Fixing crawl errors once is not enough. Technical SEO is an ongoing discipline, and crawl errors can resurface after website updates, CMS upgrades, plugin changes, or content migrations.
Best practices for ongoing crawl health monitoring:
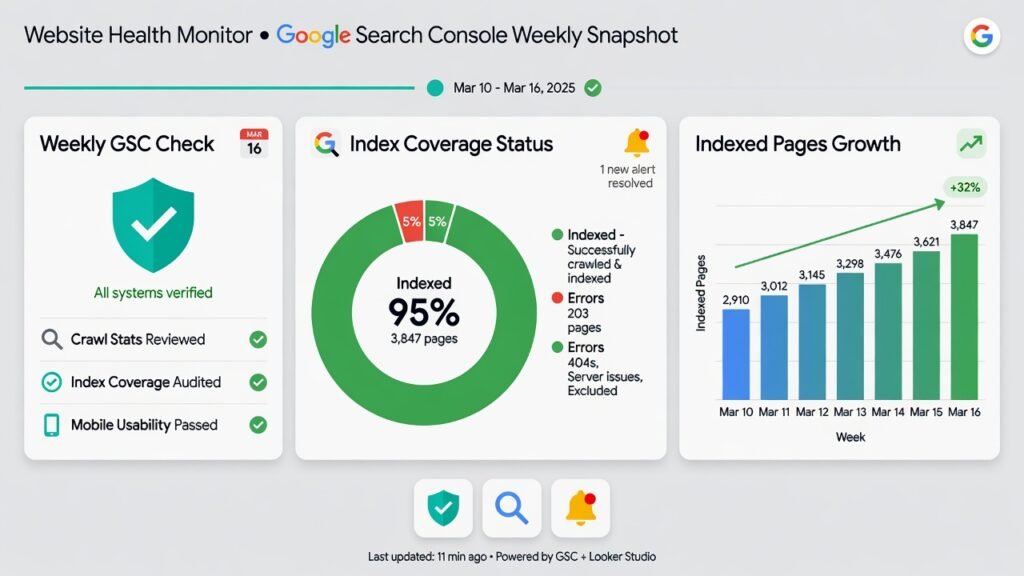
1. Weekly GSC Checks — Set a reminder to review your Coverage Report every week. Look for any new error spikes.
2. Google Search Console Email Alerts — GSC can email you automatically when it detects new crawl issues. Enable this in Settings → Notifications.
3. Scheduled Site Audits — Run a monthly site crawl using tools like Screaming Frog SEO Spider, Semrush Site Audit, or Ahrefs Site Audit. These tools catch issues before Google even reports them in GSC.
4. Monitor Core Web Vitals — GSC’s Core Web Vitals report under the “Experience” section tracks page loading performance. Poor performance can affect crawlability indirectly.
5. Track Index Count Over Time — A sudden drop in indexed pages (visible in the Coverage Report “Valid” tab) often precedes a traffic drop and signals a new crawl issue.
According to Google’s official Search Central documentation, website owners should treat their GSC Coverage Report as a living document — checking it regularly rather than reactively.
If your site is struggling with visibility beyond crawl errors, it might also be related to broader indexing or ranking issues. Learn more about what to do if your Website Not Showing on Google — a comprehensive guide covering everything from indexing issues to penalty recovery.
When to Call in an SEO Expert
While many crawl errors can be fixed with the steps above, some situations are complex enough to warrant professional technical SEO assistance. Consider bringing in an expert when:
- Your site has thousands of crawl errors spanning multiple error types simultaneously
- You’ve completed a website migration and are experiencing mass crawl error explosions
- Your crawl budget is severely depleted, and Googlebot is only crawling a small fraction of your site
- You’ve fixed errors repeatedly, but they keep recurring within days
- You’ve experienced a manual action or algorithmic penalty alongside crawl errors
- Your e-commerce platform has thousands of dynamic URLs with complex parameter handling
Professional SEO services include in-depth technical site audits, crawlability optimization, log file analysis, and structured roadmaps to restore your site’s search visibility. If you’re looking for expert help, explore professional SEO Services in USA tailored to businesses of all sizes — from local small businesses to large enterprise e-commerce platforms.
Conclusion
Crawl errors in Google Search Console are not just technical red flags — they are lost opportunities for organic visibility, traffic, and revenue. The good news is that the vast majority of crawl errors are fixable with the right knowledge, the right tools, and a systematic approach.
Here is a quick recap of everything covered in this guide:
- Understand your error types before attempting fixes — 404s, 5xx errors, redirect issues, and robots.txt blocks each have different root causes and solutions.
- Use the Coverage Report in Google Search Console as your primary diagnostic dashboard.
- Fix 404 errors with strategic 301 redirects pointing to the most relevant live pages.
- Resolve server errors by investigating hosting logs, plugin conflicts, and server resource limits.
- Audit your robots.txt file to ensure no critical pages are inadvertently blocked.
- Keep your XML sitemap clean — only include live, canonical, indexable URLs.
- Validate your fixes in GSC and request re-indexing for priority pages using the URL Inspection Tool.
- Monitor consistently — schedule weekly GSC reviews and monthly site audits to catch new issues proactively.
Crawl health is the bedrock of technical SEO. No amount of content marketing, link building, or keyword optimization can compensate for a website that Google cannot properly crawl and index. Fix your crawl errors, earn Google’s trust, and watch your organic search performance climb.